|
HOME >
Difference Engines
> RDE_1 >
Operation |
|||||||||||||||||||||||||||||||||||||||||||||
Operation |
|||||||||||||||||||||||||||||||||||||||||||||
Operation of the machine requires three steps. First, the machine must be cleared so that all axes are zeroed. Second the initial settings of the result and difference axes are set. Finally, the crank is turned, producing a result every four turns. |
|||||||||||||||||||||||||||||||||||||||||||||
| Zeroing the
machine has to be done in
the correct sequence to ensure carries are flushed out correctly.
Begin by setting both digits of the third difference axis to zero.
Since there is no carry mechanism on this axis, this is done trivially
by rotating the dials in the direction of increasing value till they
read zero. No dial should ever be turned in the direction of
decreasing value. Next,
the second difference column is zeroed. Start from the lowest
digit which is not already zero, and set it to zero. Since this
involves passing from nine to zero (because the dials cannot be turned
backwards), a carry to the next higher place will be triggered. All
higher digits on this axis should therefore be set to nine, not zero,
so
that when the crank is turned the carries will propagate leaving all
dials on this axis at zero.
Repeat the procedure for the first
difference axis, then finally the result axis. At this point, all dials
on the machine should read zero, and further turns of the crank should
have no effect. |
|||||||||||||||||||||||||||||||||||||||||||||
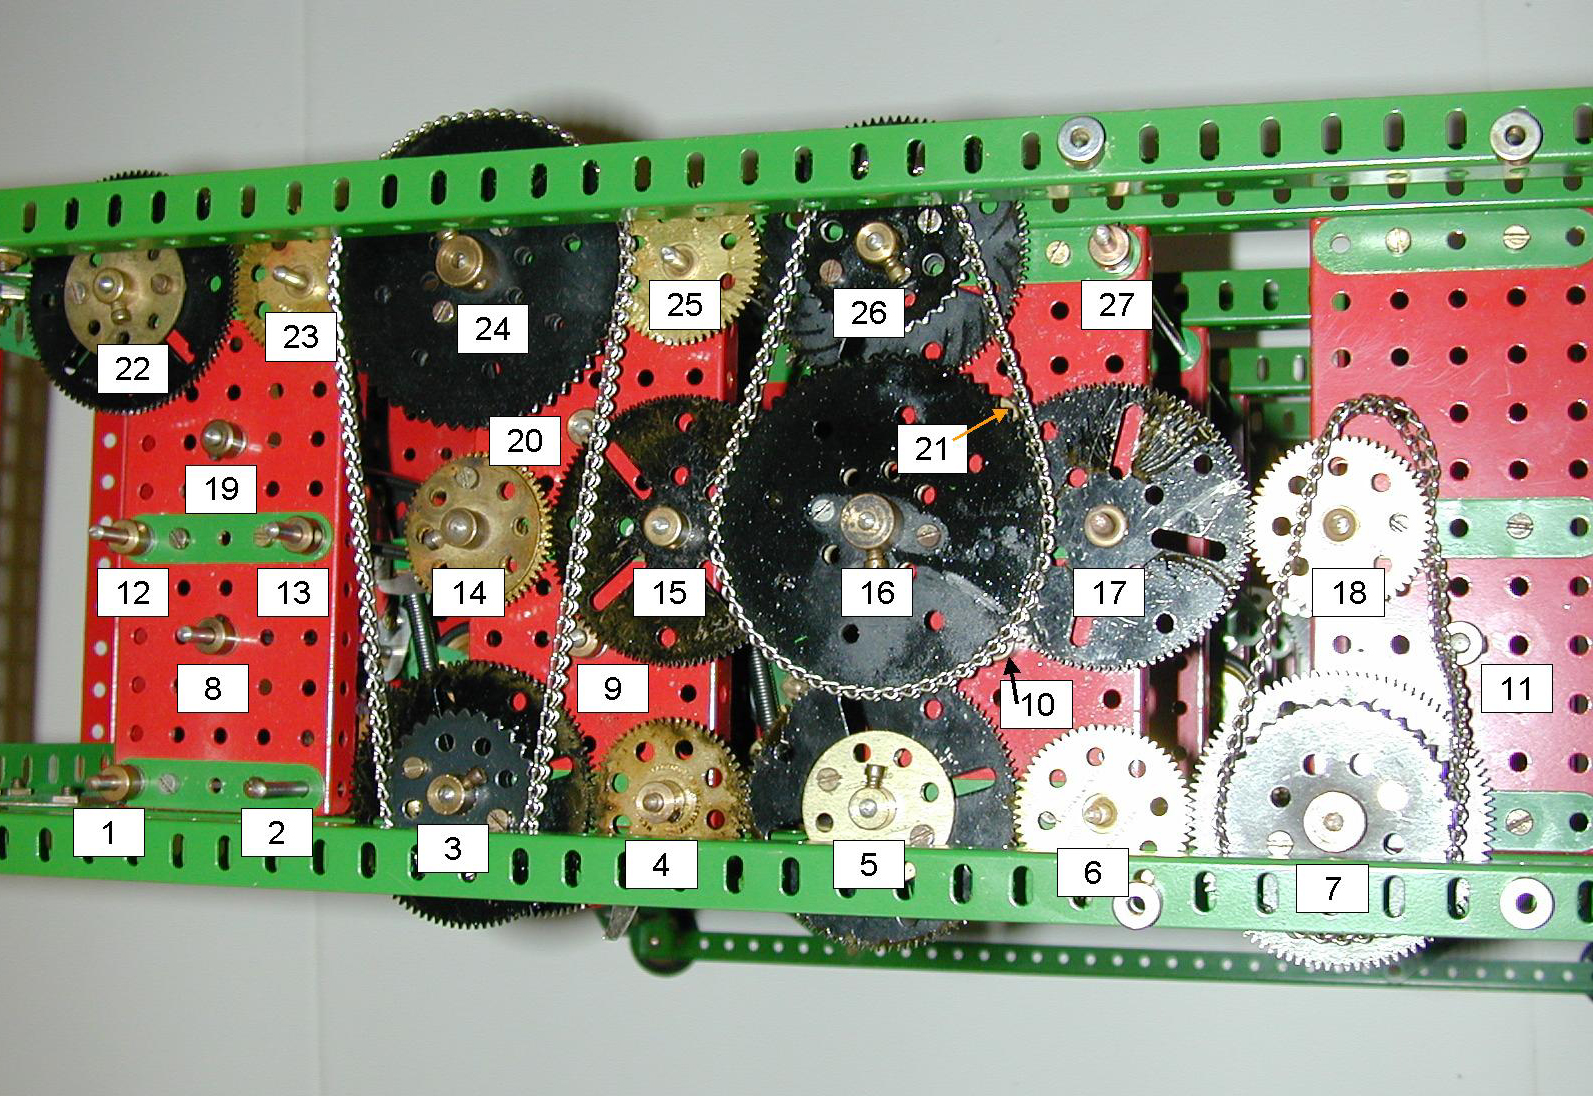
| After
zeroing the machine, the crank must be left in the correct position to
begin calculation after the initial values are set. It is a good idea
to put a mark on the 3" sprocket on the bolting axis (16 in the
Arrangement of Axes picture) so that
the
correct position can be identified easily. Since this axis only
revolves once for four turns of the crank, its position uniquely
identifies the state of the mechanism. The correct position is that in
which the propagation of the carries on the first difference axis has
just completed. From this position, the next action of the machine will
be the addition of the first difference to the result. Once this
position is set, the initial values can now be entered on the result,
first, second, and third difference axes as required. Take care not to
overshoot the desired value, since doing so will require rezeroing the
machine and starting over!
Once the values are set, just crank away. |
|||||||||||||||||||||||||||||||||||||||||||||
| As the first
example, let's use the simplest possible case, computing the table of
N^2. The table below is take from the Difference
Engine overview page: |
|||||||||||||||||||||||||||||||||||||||||||||
|
|||||||||||||||||||||||||||||||||||||||||||||
From the first row of this table (highlighted), set the result axis to zero (it already should be), the first difference to one, and the second difference to two. When the machine is cranked, the first two turns will add the first difference to the result, giving one, the correct result from the second row of the table, then the next two turns will add the second difference to the first difference giving a new value of three for the first difference. Since the third difference is zero in this example, the second difference will remain constant at two. That's all there is to it - now the cycle just repeats cranking out successive rows of the table. |
|||||||||||||||||||||||||||||||||||||||||||||
| In
a more complex example in which the third difference is not zero (and
so the second difference is not constant), we have to deal with the
fact that the addition of the third difference to the second difference
is performed in parallel with the addition of the first difference to
the result. For an example like this, let's use N^3 (again take from
the overview page). In this case our table
is: |
|||||||||||||||||||||||||||||||||||||||||||||
|
|||||||||||||||||||||||||||||||||||||||||||||
For this example the initial values should be one, seven, six, and six as highlighted in the table. That is the second and third differences should be taken from one row above the initial settings of the result and first difference values. To see why this is, remember that on the first two turns of the crank, the third difference will be added to the second at the same time as the first difference is added to the result, so that the second difference will have advanced to the value 12 before it is added to the first difference. And that's all there is to it. For any other polynomial, the only difference in setting up the machine is choosing the correct settings for these four initial values. |
|||||||||||||||||||||||||||||||||||||||||||||
|
Framework Arrangement of axes and drive system Decimal digit storage Digit readout and addition Carry detection and propagation Setup and adjustment > Operation Parts List |
|||||||||||||||||||||||||||||||||||||||||||||
|
|||||||||||||||||||||||||||||||||||||||||||||